There’s no two ways about it –– Gravity Jack builds a lot of Unity and native mobile apps. We use Unity often because, when it comes to gaming, augmented reality or virtual reality, it’s one of the best tools possible for showing 3D content.
One of the biggest challenges when using Unity for mobile AR/VR purposes can be providing a user interface that feels native. While Unity 5 improved the UI widget interactions, it’s not difficult to be left wanting more when compared to native UI widgets.
Here at Gravity Jack, we won’t settle for a ‘meh’ or even a ‘huh. not bad!’ user experience, so we set out to integrate the native UI widgets with a Unity scene, writing the latest chapter in our constant quest to ‘create The Future Experience!’
For starters, our team required a solution that is easy to maintain and that will work with our automated build pipeline. Additionally, it must work on both iOS and Android platforms.
After a bit of work, we’re glad to say that this series of back-to-back posts will show you how you too can fuse the native UI with Unity. Today we’re looking at iOS. Tomorrow, we’ll be posting Android so stay tuned!
iOS Native UI Overlay for Unity

1) Create a custom app delegate that overloads UnityAppController. This file should be a .mm file such as YourCustomAppDelegatesName.mm
#import “UnityAppController.h”;
@interface YourCustomAppDelegatesName : UnityAppController
2) Add your UI that you want to overlay in
willStartWithViewController:(UIViewController*)controller
I loaded my UI from a xib file.
- (void)willStartWithViewController:(UIViewController*)controller
{
// Load your custom view controller from a xib.
_viewController = [[[MyCustomViewController alloc] initWithNibName:@"MyCustomViewController" bundle:[NSBundle mainBundle]] retain];
// Make your view controller the root view controller
_rootController = _viewController;
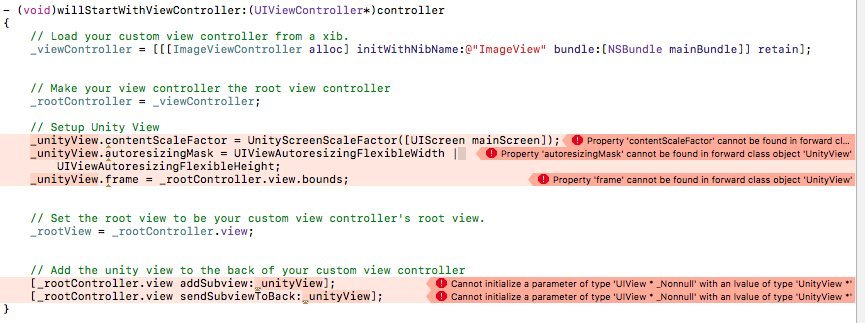
// Setup Unity View
_unityView.contentScaleFactor = UnityScreenScaleFactor([UIScreen mainScreen]);
_unityView.autoresizingMask = UIViewAutoresizingFlexibleWidth | UIViewAutoresizingFlexibleHeight;
_unityView.frame = _rootController.view.bounds;
// Set the root view to be your custom view controller's root view.
_rootView = _rootController.view;
// Add the unity view to the back of your custom view controller
[_rootController.view addSubview:_unityView];
[_rootController.view sendSubviewToBack:_unityView];
}
3) Finally add the define that unity has provided(in UnityAppController.h) for you to overload their app delegate at the bottom of your custom app delegate file. (yes the very end. after the @end.)
@end
IMPL_APP_CONTROLLER_SUBCLASS(YourCustomAppDelegatesName)
4) Place all of your UI files and your custom app delegate into the /Plugins/iOS/ folder.

Note: If you are using ARC(Automatic Reference Counting) you will need to add the -fno-objc-arc flag to the compiler settings for your custom app delegate file.

That should have you good to go! Hope this helps. If you have a question or find yourself struggling with a step, let us know by tweeting us and we’ll be sure to help however we can.
Stay tuned tomorrow, when we’ll be posting the Android tutorial for native UI overlay with Unity. Happy coding!
Here’s a resolution, sent over from our friend @_theChief_, that may get to the bottom of what you’re running into.
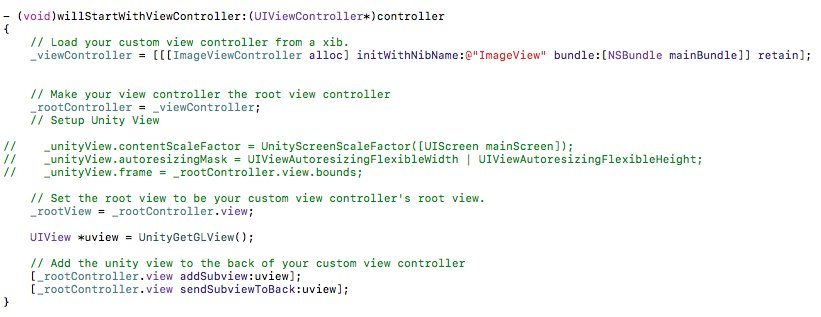
If this helps you out, be sure to give him a virtual high-five! If not, hit us up with some screenshots and we’ll be glad to help. 🙂